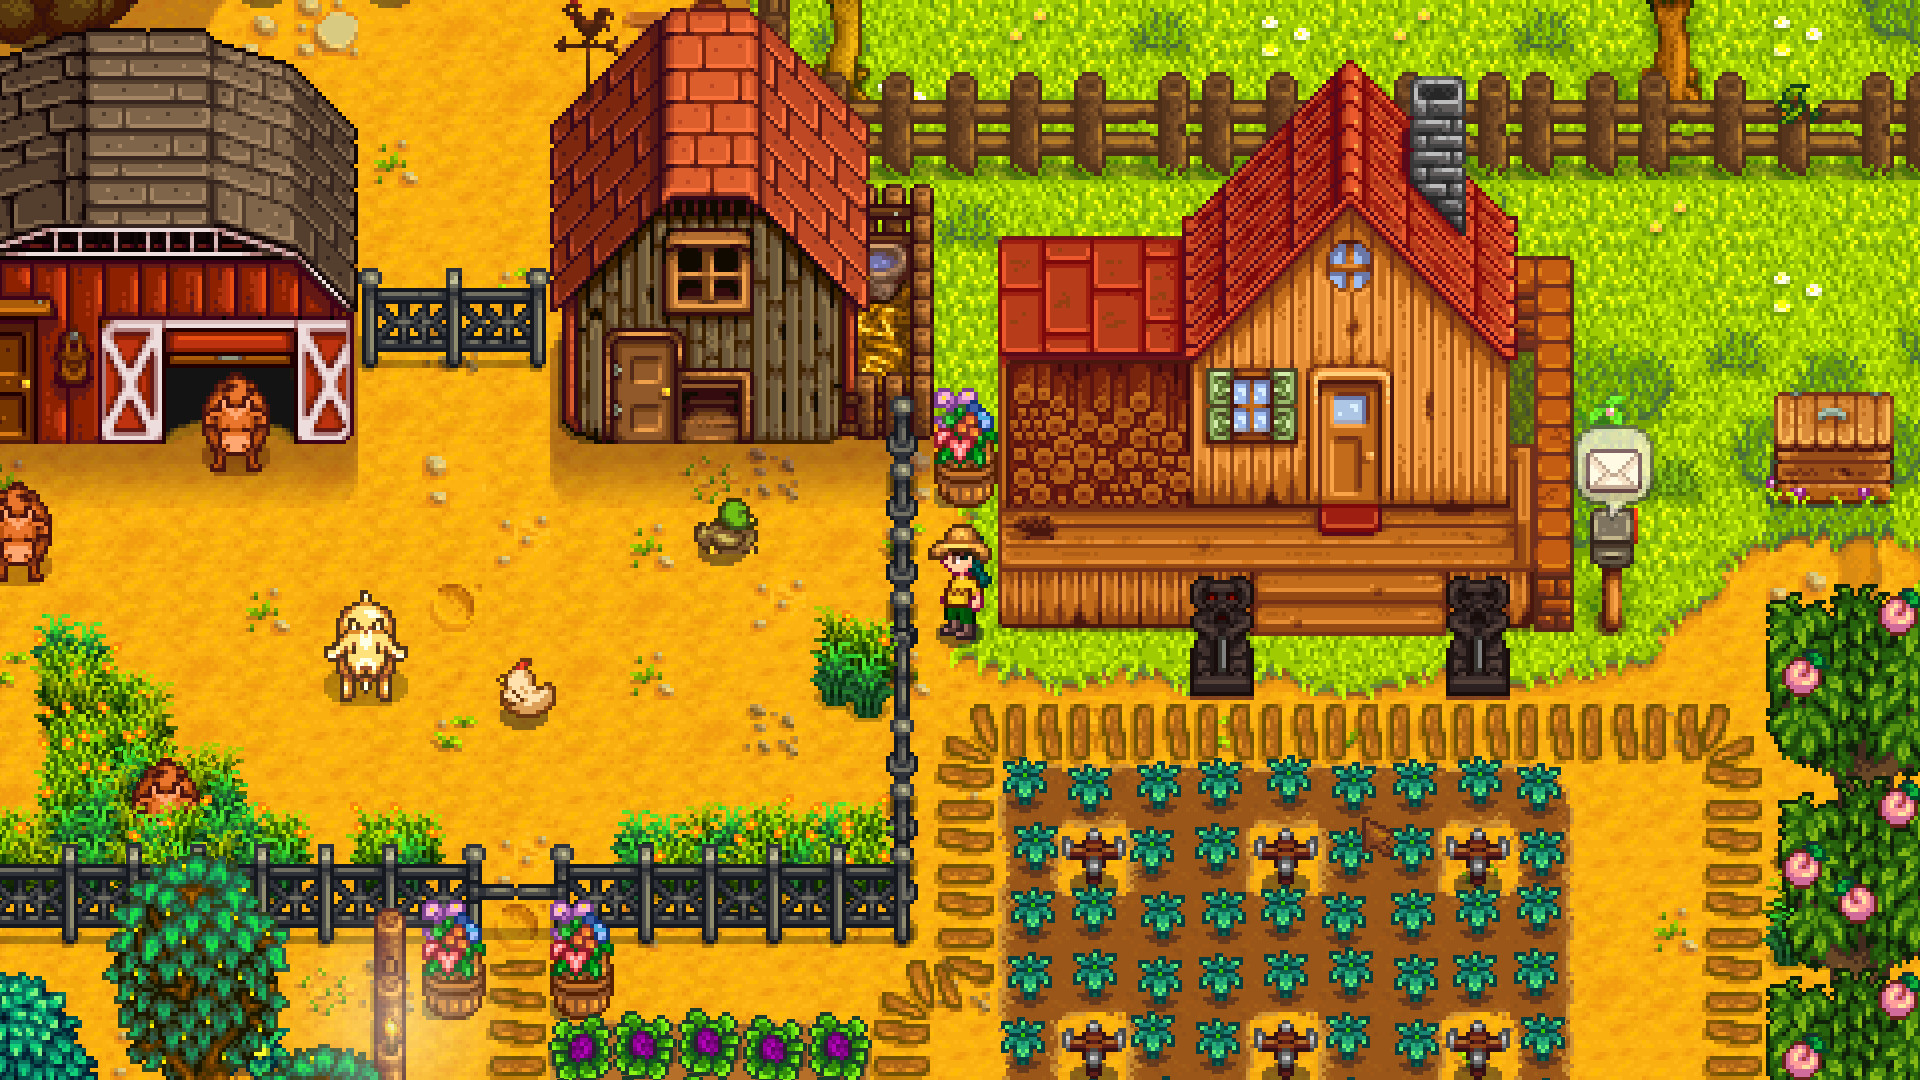
Published guide

Trophy guide

Stardew Valley

A PS4 route through the Community Center, a separate Joja farm, the current collections and arcade trophies, followed by the optional 1.6 Update and Summit goals.

PS4

Trophies
50
Difficulty
Platinum: 6/10. Full trophy list: 6/10.
Completion time
Platinum: 120–180 hours. All 50 trophies: 160–240 hours total.
Playthroughs
One developed main farm, plus a separate Joja-route farm.

Before you play

Known trophy issues
Reported issues
Missable trophies
Yes · plan ahead
Chapter select
Unavailable
Postgame cleanup
Available

Community Center and Joja development need separate farms. Seasons repeat without an ending deadline. Current recipe collections include island and mastery unlocks. Preserve deathless arcade checkpoints by sleeping only after a successful stage.

Your route to completion

Begin a new single-player farm with normal bundles and standard profit margins. I recommend keeping that first farm on the Community Center route and using a separate farm for Joja. Buying membership permanently replaces the Center, so read Local Legend before making that choice.

Follow Roadmap for the order of work and the opportunities coming up each season. Its seven sections are route stages, not game chapters. Trophies contains the exact collection lists, unlock steps and recovery advice. Open a linked solution before its named task, then return to the route.

Platinum and full completion

Scope Plan
Base platinum 41 base trophies, about 120–180 hours, around 6/10
All 50 trophies About 160–240 hours total, including the island's Summit route

These are planning ranges. Arcade practice, random drops and the number of seasonal waits can change the time considerably. The nine 1.6 Update trophies do not belong to the platinum, but later cooking and crafting recipes still affect the base collection trophies on the current PS4 version. This route is for the updated PS4 game, including when played on PS5, rather than the older Vita release.

Build one main farm, then take the other branch

Start by planting crops, learning fishing and descending the Mines. Keep bundle donations and spare seasonal ingredients, watch the TV cooking show and build friendships from the first spring. Restore the Community Center, open Willy's boat and continue the main farm through the island, collection, family and money goals.

The farm has no ending deadline. Missed crops, fish and festivals return in later years. The lasting branch choice is between the Community Center and Joja, so we keep those on different saves rather than relying on an old same-farm trick.

Play the Saloon arcade during the hunt. Fector's Challenge is the main skill check, and its stage-by-stage overnight save method avoids repeating the whole run after every failure. Junimo Kart is not needed for the platinum.

Once the main farm's base goals and the arcade are finished, earn Joja Co. Member Of The Year on the second farm. Return to the main farm for the optional update group and Perfection.

Keep useful progress

Keep each collection on the same farmer rather than splitting catches, recipes or earnings between farms. Use Collections for shipped items, fish and cooked dishes, and enable Show Advanced Crafting Information in Options for crafted counts. Discovered museum items still need to be donated.

The game normally saves when we sleep. A single-player day can be replayed by quitting to the title screen and loading before the next overnight save. Keep the console connected to PlayStation Network and check important trophy unlocks when their condition is met. Console trophy resending has had problems, so do not sleep through an unnoticed failed unlock and assume it will repair itself automatically.

Start the main farm and its weekly routines

Start a single-player farm with normal bundles and normal profit margins. I recommend the Standard Farm for open crop space. Keep this as the main Community Center save and leave Joja membership alone.

Clear a small patch, plant and water the starter Parsnips, then build a Chest for materials and future donations. Select tools with L2 buttonL2 or R2 buttonR2, use them with Square button, and interact with people or containers using Cross button. Options button opens the player menu and Triangle button opens Crafting. These are the default PlayStation controls.

Visit Willy for the fishing rod after his letter. From Spring 5, begin the Mines and trigger the Community Center introduction. Read Local Legend before spending money on a membership.

Set up routines early. Watch The Queen of Sauce on Sundays and Wednesday reruns, check Help Wanted outside Pierre's, talk to villagers and give two useful gifts per week. Save at least some of every new crop, fish and forage item instead of shipping the whole stack. Turn on Show Advanced Crafting Information so crafted items have visible counts.

Sleep at home before 2am. The normal single-player save happens overnight. Quitting to the title screen and loading the farm replays the unsaved day, so it is a recovery option when an important morning goes wrong. It is not a second manual save slot.

Greenhorn

bronze · grind

Earn 15,000g

Reach 15,000g in total earnings on one farm. This is lifetime income, so spending money on seeds, tools and buildings does not erase progress. Check the total on the Inventory screen.

Grow and sell crops while expanding into processing machines. Keep bundle donations, recipe ingredients and a seed supply before shipping the surplus. Continue the same farm towards Legend.

SourcesPlayStationTrophies: Stardew Valley trophy list · Stardew Valley Wiki: Player Menu · Stardew Valley Wiki: Farming

Cowpoke

bronze · grind

Earn 50,000g

Reach 50,000g in total earnings on one farm. This is lifetime income, so spending money on seeds, tools and buildings does not erase progress. Check the total on the Inventory screen.

Grow and sell crops while expanding into processing machines. Keep bundle donations, recipe ingredients and a seed supply before shipping the surplus. Continue the same farm towards Legend.

SourcesPlayStationTrophies: Stardew Valley trophy list · Stardew Valley Wiki: Player Menu · Stardew Valley Wiki: Farming

Homesteader

bronze · grind

Earn 250,000g

Reach 250,000g in total earnings on one farm. This is lifetime income, so spending money on seeds, tools and buildings does not erase progress. Check the total on the Inventory screen.

Grow and sell crops while expanding into processing machines. Keep bundle donations, recipe ingredients and a seed supply before shipping the surplus. Continue the same farm towards Legend.

SourcesPlayStationTrophies: Stardew Valley trophy list · Stardew Valley Wiki: Player Menu · Stardew Valley Wiki: Farming

Millionaire

bronze · grind

Earn 1,000,000g

Reach 1,000,000g in total earnings on one farm. This is lifetime income, so spending money on seeds, tools and buildings does not erase progress. Check the total on the Inventory screen.

Grow and sell crops while expanding into processing machines. Keep bundle donations, recipe ingredients and a seed supply before shipping the surplus. Continue the same farm towards Legend.

SourcesPlayStationTrophies: Stardew Valley trophy list · Stardew Valley Wiki: Player Menu · Stardew Valley Wiki: Farming

A New Friend

bronze

Reach a 5-heart friend level with someone.

Raise one villager to five hearts, shown on the Social tab. Talk to them daily and give a liked or loved gift twice each week. Birthdays give a much larger gift bonus, so check the calendar outside Pierre's.

Select the gift in your toolbar and interact with the villager using Cross button. A selected item may be handed over, so switch to a tool when you only want to talk. For a convenient first friendship, Linus accepts ordinary foraged fruit and vegetables he likes and lives in the tent north of Robin's.

Keep building friendships using Popular and The Beloved Farmer.

SourcesStardew Valley Wiki: Friendship · Stardew Valley Wiki: Controls · Stardew Valley Wiki: Linus

D.I.Y.

bronze

Craft 15 different items.

Craft 15 different items yourself. Press Triangle button to open Crafting and select recipes whose materials you have gathered.

Repeatedly crafting Chests only counts as one kind. Make a range of useful starter items, such as a Chest, Torch, Campfire, Wood Sign, Stone Sign, paths, fences and processing equipment as their recipes unlock. Turn on Show Advanced Crafting Information in Options to see each recipe's crafted count.

Keep going towards Craft Master.

SourcesStardew Valley Wiki: Crafting · Stardew Valley Wiki: Controls

Fisherman

bronze

Catch 10 different fish.

Catch ten different entries yourself with a rod or Crab Pots. Bought fish and fish raised in a Fish Pond do not count as your own catches.

Visit Willy after his opening letter for a rod. Cast with Square button, then use short presses and releases to keep the green bar over a hooked fish until the catch meter fills. The Training Rod is useful while learning, but its restricted catch pool cannot complete the collection.

See Master Angler for the fishing plan and special waters.

SourcesStardew Valley Wiki: Fishing · Stardew Valley Wiki: Controls · Stardew Valley Wiki: Fish

Gofer

bronze

Complete 10 'Help Wanted' requests.

Complete ten requests. Check the small Help Wanted board on the front of Pierre's shop for a yellow exclamation mark, accept a job and finish its instructions before its deadline.

An ordinary delivery gives the current day and the next day. Hold the requested item, interact with the named villager and claim any Journal reward. The larger Special Orders board and Qi's orders also count, but accepting a request without finishing it does not.

Continue this routine for A Big Help.

SourcesStardew Valley Wiki: Quests

Follow the seasons and restore the Community Center

Work through the first seasonal cycle using Local Legend. Keep seasonal bundle donations and ship spare crops towards Polyculture. Use the collection totals to avoid guessing what has already shipped.

Buy Strawberry Seeds on Spring 13 and the Tub o' Flowers recipe on Spring 24. Save gold Cauliflower for An Unforgettable Soup on Summer 11. Keep quality display items for Blue Ribbon on Fall 16, buy Jack-O-Lantern's recipe on Fall 27 and use the Night Market submarine on Winter 15–17.

These annual opportunities return if missed. A delayed crop, recipe or fish means another season or year, not a ruined farm. There is no trophy deadline at Grandpa's Year 3 evaluation.

Descend the Mines in five-floor elevator increments, order the first two farmhouse upgrades, and keep friendship growing alongside farm work. Start the Special Orders board below Lewis's house from Fall 2 and prioritise the recipe rewards listed in Craft Master.

Finish the Center's bundles and attend its ceremony. Do not try to buy Joja afterwards on this same farm. We use a separate save for that branch.

Best Friends

bronze

Reach a 10-heart friend level with someone.

Reach ten hearts with one villager. Check the Social tab rather than judging from dialogue or an event.

Choose a non-datable villager such as Linus and keep talking and gifting after five hearts. Datable villagers stop at eight hearts until given a Bouquet from Pierre, so they take an additional step.

The wider plan and eight suitable long-term friendships are in The Beloved Farmer.

SourcesStardew Valley Wiki: Friendship

Cliques

bronze

Reach a 5-heart friend level with 4 people.

Reach five hearts with four villagers on the same farm. Talk and gift along the routine in Popular. Four half-finished relationships are not enough, so use the Social tab to check that each chosen person has at least five filled hearts.

Friendship can fall while neglected. Keep greeting unfinished friends while the farm's other goals progress.

SourcesStardew Valley Wiki: Friendship

Networking

bronze

Reach a 5-heart friend level with 10 people.

Reach five hearts with ten villagers on the same farm. Work on the eight long-term friends in The Beloved Farmer, then include two more people you pass regularly.

Use the Social tab to check each person's hearts and gift allowance. Spreading gifts across ten people is more useful here than giving extra gifts to someone already at the cap.

SourcesStardew Valley Wiki: Friendship

Cook

bronze

Cook 10 different recipes.

Cook ten different dishes yourself. Buy Robin's first farmhouse upgrade for a kitchen, or craft a Cookout Kit once it unlocks through Foraging.

Select a known recipe at the kitchen with its ingredients in your inventory or fridge. Bought meals and dishes mailed by villagers do not count as cooking. Follow Gourmet Chef for recipe sources and the full collection method.

SourcesStardew Valley Wiki: Cooking · Stardew Valley Wiki: Farmhouse

Moving Up

bronze

Upgrade your house.

Visit Robin's Carpenter's Shop in the mountains with 10,000g and 450 Wood, then order the first farmhouse upgrade. Let the three-day construction finish.

The added kitchen and larger bed confirm the upgrade. It also lets us cook and marry. Robin must be at her shop counter to take the order, so return another day if she is away or already building something.

SourcesStardew Valley Wiki: Farmhouse · Stardew Valley Wiki: Carpenter's Shop

Artisan

silver

Craft 30 different items.

Craft 30 distinct recipes yourself. Bought items, reward machines and items found in the world do not count as having crafted their recipe.

Enable Show Advanced Crafting Information in Options. Move the cursor over each recipe and make one when its crafted count is zero. Follow Craft Master for the recipes that do not come from normal skill levels.

SourcesStardew Valley Wiki: Crafting

Ol' Mariner

bronze

Catch 24 different fish.

Catch 24 different entries on the same farmer. Use rivers, the mountain lake and ocean in different seasons rather than fishing at one spot indefinitely.

Crab Pots add a separate group of catches. Place baited pots in both freshwater and the ocean, then collect and rebait them daily. Follow Master Angler for the complete catch route.

SourcesStardew Valley Wiki: Fish · Stardew Valley Wiki: Crab Pot

Mother Catch

bronze

Catch 100 fish.

Catch 100 fish in total on one farmer. Repeated species count, so this comes naturally while completing Master Angler.

Fish at a convenient lake or river if only the quantity remains. Land the catches rather than buying fish or taking them out of a Fish Pond. Trash does not advance the fishing achievements.

SourcesStardew Valley Wiki: Achievements · Stardew Valley Wiki: Fishing

Treasure Trove

bronze

Donate 40 different items to the museum.

Donate 40 different artifacts or minerals to Gunther at the museum, southeast of town. Speak to him at the counter with new finds in your inventory and place them on the displays.

Opening geodes at Clint's and digging artifact spots gives a steady supply. The museum's donation rewards show progress. Continue to all 95 donations using A Complete Collection.

SourcesStardew Valley Wiki: Museum

Polyculture

bronze · collectible

Ship 15 of each crop.

Ship at least 15 of each of the following 28 crops through the farm Shipping Bin. Selling directly to Pierre does not advance this shipping record.

Season Required crops
Spring Cauliflower, Coffee Bean, Garlic, Green Bean, Kale, Parsnip, Potato, Rhubarb, Strawberry
Summer Blueberry, Corn, Hops, Hot Pepper, Melon, Radish, Red Cabbage, Starfruit, Tomato, Wheat
Fall Amaranth, Artichoke, Beet, Bok Choy, Cranberries, Eggplant, Grape, Pumpkin, Yam

The grouping is a growing plan, not a requirement to ship within that season. Coffee and Corn cross seasons. Garlic, Red Cabbage and Artichoke become normal Pierre stock in Year 2. Sandy sells Rhubarb, Starfruit and Beet seeds after bus repair. Buy Strawberry Seeds at the Spring 13 Egg Festival. Coffee Beans can come from the Traveling Cart or Dust Sprites.

Check each crop's shipped quantity in Collections and bring it to 15 or more. Regrowing crops need fewer plants, but count harvested items rather than seeds planted. Current additions such as Carrot and Broccoli belong to the wider shipment collection, not this fixed 28-crop requirement.

SourcesStardew Valley Wiki: Achievements · Stardew Valley Wiki: Crops · Stardew Valley Wiki: Pierre's General Store · Stardew Valley Wiki: Oasis

Monoculture

bronze · grind

Ship 300 of one crop.

Ship 300 of one eligible crop through the farm Shipping Bin. Blueberries are a straightforward summer choice because a harvest produces several berries and the plants regrow.

Buy and plant a substantial patch early in summer, water it daily or use sprinklers, and ship the harvests until Collections shows 300 Blueberries shipped. More than one year is allowed. Preserve enough money for replacement seeds and other farm work.

Any one of the 28 crops listed under Polyculture works. Ancient Fruit and the ordinary Tulip, Blue Jazz, Summer Spangle and Fairy Rose crops are also eligible.

SourcesStardew Valley Wiki: Achievements · Stardew Valley Wiki: Crops

The Bottom

bronze

Reach the lowest level of the mines.

Reach floor 120 of the normal Mines in the northeast mountains. The landslide clears on Spring 5, Year 1. Marlon gives the initial sword when we enter.

Bring a Pickaxe, weapon and healing food. Break rocks and defeat monsters to reveal a ladder, then descend. Every fifth floor adds an elevator checkpoint, so aim for five or ten new floors per visit and use the elevator to resume later.

Upgrade the Pickaxe at Clint's to make deeper rock less tiring. Keep enough health to survive the next hit and leave before the day ends. Floor 100 contains a Stardrop. Floor 120 holds the Skull Key and completes this trophy.

The random floors do not require clearing every rock. If a floor is crowded or time is running out, a crafted Staircase can take us down. Skull Cavern's endless depth and Ginger Island's Volcano are different dungeons.

SourcesStardew Valley Wiki: The Mines

Local Legend

bronze · missable

Restore the Pelican Town Community Center.

Restore the Community Center on a farm where you have not bought Joja membership. The Community Center and Joja development trophies require different farms on the current version. Buying membership permanently replaces the Center, and finishing the Center closes Joja.

From Spring 5 onward, enter town from the Bus Stop on a dry day between 8am and 1pm for Lewis's introduction. Enter the building north of Pierre's, read the golden scroll in its lower-left room, then read the Wizard's next-day invitation. Visit his tower at the western side of Cindersap Forest to learn the scrolls' language.

Return and donate each room's requested bundles. Use the bundle icon from the Inventory menu to check outstanding items while away from the building. Normal bundles are recommended for this route.

Keep the seasonal donations

Work What to reserve
Spring One of each spring forage and crop, five gold Parsnips if using that quality-crop option, and rain-only fish
Summer Melon, Tomato, Hot Pepper, Blueberry, Poppy, Fiddlehead Fern, Red Cabbage and summer fish
Fall Pumpkin, Corn, Eggplant, Yam, Sunflower, three Apples and a Pomegranate
Winter Winter forage and a Nautilus Shell from the beach
Animals Appropriate large milk or eggs, Duck Egg, Wool, Truffle, Duck Feather and Rabbit's Foot as the bundles require
Trees and processing Maple Syrup, Oak Resin, Wine and the artisan goods chosen for the Pantry

This is preparation, not a replacement for the exact slots on each scroll. Some bundles accept a selection, while others require every item. Keep the stated quantity and quality before shipping the surplus.

Visit the Traveling Cart in western Cindersap Forest on Fridays and Sundays for hard-to-find donations. Red Cabbage is normal Pierre stock from Year 2, so we do not need a lucky first-year cart to finish. Plant Apple and Pomegranate saplings early enough for their 28-day growth before fall, or use the Greenhouse and other valid sources later.

The six rooms unlock through earlier bundle progress. The Vault requires four payments totalling 42,500g. Restoring the Pantry opens the Greenhouse and helps our later income and collection work.

Finish every bundle, sleep and enter town on a sunny nonfestival day for the reopening ceremony. Watch it and check the trophy before treating the route as finished. There is no deadline at the end of Year 1 or Year 2.

SourcesStardew Valley Wiki: Community Center · Stardew Valley Wiki: Bundles · Stardew Valley Wiki: Traveling Cart · Stardew Valley Wiki: Fruit Trees

Singular Talent

bronze

Reach level 10 in a skill.

Reach natural level 10 in any one of Farming, Mining, Foraging, Fishing or Combat. Temporary food buffs do not replace earned skill levels.

Farming advances through harvesting crops and tending animals. Fishing advances through successful catches and collected Crab Pot catches. Choose work that already supports the collections, then sleep to receive the level-up rewards.

The complete five-skill route is in Master Of The Five Ways.

SourcesStardew Valley Wiki: Skills

Blue Ribbon

bronze · 1.6 Update · optional

Get 1st place in the Stardew Valley Fair competition.

Win first place in the grange display at the Stardew Valley Fair on Fall 16. Enter Pelican Town between 9am and 3pm with nine display items, place them in the empty stand and tell Lewis we are ready for judging.

A winning display needs at least 90 points. Fill all nine slots and cover at least six of the eight scoring categories. Quality and base value matter, so keep valuable gold or iridium examples in advance.

Category Useful examples to save
Animal products Large Milk, Large Goat Milk, Duck Egg or Rabbit's Foot
Artisan goods Cheese, Goat Cheese, Truffle Oil or Wine
Cooking A valuable cooked dish such as Pink Cake
Fish Gold or iridium high-value fish
Forage, flowers and tree products Purple Mushroom or a good-quality flower
Fruit Melon or Ancient Fruit
Minerals Diamond
Vegetables Pumpkin or Cauliflower

Choose six or more categories, then fill spare slots with more valuable goods. A dependable later-farm option is nine iridium items worth at least 200g each, which supplies enough quality/value points even without category variety. Choose the varied display if that stock is not available.

Read the judging result and take the first-place reward. Recover all nine display items before leaving. A loss can be retried by reloading that morning before sleeping, or at the next year's fair. Ordinary first place is required, not Lewis's shorts blackmail result.

SourcesStardew Valley Wiki: Stardew Valley Fair

An Unforgettable Soup

bronze · 1.6 Update · optional

Delight the Governor.

Bring a gold-quality Cauliflower to the Luau on Summer 11. Save one from spring before selling the crop. Gold-quality Large Milk is another straightforward best-response ingredient.

Enter the beach between 9am and 2pm with the ingredient, interact with the soup pot to add it, then speak to Lewis to begin the tasting. The Governor must give the best response, not merely call it good.

Quality matters. Normal Cauliflower does not substitute for the gold version in this route. Do not add a cooked meal or Lewis's shorts. In multiplayer, every player must add an eligible best-response ingredient, as a missing or bad contribution can spoil the result.

If the response is wrong, reload the morning before sleeping or return next year with the correct item.

SourcesStardew Valley Wiki: Luau

Open the desert, island and mastery work

Bus repair opens Calico Desert, Sandy's seeds and Skull Cavern. Take the Skull Key from floor 120 of the normal Mines before entering the cavern.

After restoring the Community Center, follow A Distant Shore to repair Willy's boat. Even if we are only chasing the base platinum, the current all-recipe requirements need Ginger Island.

Restore the island farmhouse, open the trader and resort, visit the Volcano merchant and reach its Forge. Use the Golden Joja Parrot's paid Walnut route if preferred. Keep working on Professor Snail's fossils separately, as bought Walnuts do not grant the crafting recipe from his collection.

Reach level 10 in all five skills, then continue earning XP for all five mastery rewards. Start the Giant Stump's raccoon requests after the Greenhouse and windstorm event. Its weekly waits can run alongside the other collections.

Maintain the main farm's crops and relationships between island trips. This is also a good point to marry and begin the child wait in Full House.

Sous Chef

silver

Cook 25 different recipes.

Cook 25 different recipes yourself. Repeating a single cheap dish does not advance the variety requirement.

Use the Cooking page in Collections to find dishes not yet cooked, and learn more from the TV, friendships, shops and skill levels. Gourmet Chef gives the full route and the island recipes that old lists omit.

SourcesStardew Valley Wiki: Cooking · Stardew Valley Wiki: Collections

Living Large

bronze

Upgrade your house to the maximum size.

Order the second farmhouse upgrade from Robin after finishing the first. On version 1.6 it costs 65,000g and 100 Hardwood. Wait for construction to finish.

This adds the nursery and is enough for this trophy. The later 100,000g cellar and optional room renovations are not required for this trophy. The cellar is still needed to learn Cask for Craft Master. Keep the crib if you are still working on Full House.

Upgrade the Axe to Steel and remove the large log at the northwestern corner of Cindersap Forest to enter the Secret Woods. Its six large stumps regrow daily and provide Hardwood for the order.

SourcesStardew Valley Wiki: Farmhouse · Stardew Valley Wiki: Secret Woods

A Distant Shore

bronze · 1.6 Update · optional

Reach Ginger Island.

Finish the Community Center or all five Joja development projects, then read Willy's letter inviting us to the back room of his Fish Shop. Enter the door behind his counter and inspect the broken boat.

Bring 200 Hardwood, five Iridium Bars and five Battery Packs. Interact with the hull, anchor and ticket machine to deliver the matching repairs. Sleep for Willy and Robin's restoration scene, then return to the back room and pay 1,000g for a ticket.

Ride the boat and arrive on Ginger Island. A different scheduled overnight scene can delay the repair scene, so sleep another night if necessary. The boat ticket includes the return journey.

For the Hardwood, use the Steel Axe in the Secret Woods. Lightning Rods left outside during storms supply Battery Packs. Smelt Iridium Ore from Skull Cavern or use a developed farm's existing supply for the bars.

Open the island's useful areas

Bring a Watering Can, Pickaxe, weapon and healing food on exploration trips. Follow Leo east from the dock into the jungle. Take the Walnut from the bush beside the stairs to Leo's hut, climb to his hut and give its parrot one Walnut to open the northern route.

Walk north to the Volcano. The Golden Joja Parrot west of the Volcano can collect remaining Walnuts for 10,000g per missing Walnut. It is available on a Community Center farm too. This is my direct alternative if we would rather fund the unlocks than follow 130 hidden pickups. Sleep after paying to receive them.

Use Walnuts to open the west farm for ten, restore its farmhouse for 20, then unlock the Island Trader for ten and the beach resort for 20. The farmhouse lets us sleep on the island. The resort opens the southeast beach and Pirate Cove.

Enter the Volcano with the Watering Can and pour water onto lava to make a crossing. Find each floor's exit and stand on the pressure switches when a gate is locked. Floor 5 has the Dwarf merchant. Reach floor 10 for the Forge, then open its shortcut back to the entrance.

These areas support the current cooking, crafting, fish and monster collections as well as the update trophies.

SourcesStardew Valley Wiki: Fish Shop · Stardew Valley Wiki: Ginger Island · Stardew Valley Wiki: Golden Walnut · Stardew Valley Wiki: Volcano Dungeon · ConcernedApe: Stardew Valley 1.6 changelog

Finish the main farm's collections and money goals

Use Master Angler for all 72 catch entries, Gourmet Chef for the current 81 dishes and Craft Master for the 149 required crafted items. Their counts apply to this version, so a fully checked old launch-era list can still be incomplete.

Order the 100,000g cellar upgrade to learn Cask, then craft one even though the room comes with free Casks. Keep Emily and Shane in the cooking friendships, as their mailed recipes are required too.

Donate all 95 museum items, claim its reward and find all seven Stardrops. Check the Guild wall and finish each of its 12 monster targets. Bring a developed loadout and food to the Volcano and Skull Cavern grinds.

Grow and process enough high-value crops for ten million lifetime earnings. Keep spending on useful upgrades, as the earnings trophies do not need that much cash held at once.

Finish eight ten-heart friendships and 20 five-heart friendships, 40 requests and both children. Track these on the same main farm. Use the collection and crafted-count screens to identify the actual gaps instead of repeating completed work.

Spoiler: reveal trophy

Legend

gold · grind

Earn 10,000,000g

Earn 10,000,000g in total on a single farm. The total earned value on the Inventory screen matters, not the amount currently in your wallet. Separate farms do not combine their earnings.

Build a repeatable income loop. Grow Ancient Fruit or Starfruit under sprinklers in the Greenhouse and later on the island, then process the fruit in Kegs. Farming level 8 unlocks Kegs. Choose Tiller at Farming 5 and Artisan at Farming 10 for the artisan-goods price bonus. Keep Oak trees tapped for the Oak Resin needed to expand the Keg supply.

The first Ancient Seed artifact can be donated to Gunther for a plantable seed and its recipe. Grow that plant somewhere it survives the season change, then use a Seed Maker to expand it. Starfruit Seeds are sold by Sandy after repairing the bus and grow in summer outdoors, or year-round in the Greenhouse and on Ginger Island.

Harvest, refill machines and ship each batch. Wine does not need to be aged to make this work. A cellar is an optional slower bonus, not a requirement to sell profitable wine. Continue checking the lifetime total while spending on the other trophies.

SourcesStardew Valley Wiki: Player Menu · Stardew Valley Wiki: Farming · Stardew Valley Wiki: Keg · Stardew Valley Wiki: Ancient Seeds · Stardew Valley Wiki: Oasis

A Complete Collection

silver · collectible · grind

Complete the museum collection.

Donate all 95 museum items to Gunther, then collect the Stardrop reward at his counter. The museum is in southeastern Pelican Town, below Clint's Blacksmith. Its collection is 42 artifacts and 53 minerals.

Carry new finds to Gunther before selling them. An undonated object's description tells you that Gunther can explain it. The Artifacts and Minerals pages in Collections record discoveries, not proof of donation, so compare the displays as well.

Use these routes to fill the gaps:

Missing group Where to work
Common minerals Break gem nodes and open Geodes, Frozen Geodes and Magma Geodes at Clint's
Remaining geode minerals Open Omni Geodes, keeping duplicates for later trades
Most artifacts Hoe the wriggling artifact spots around the valley and open fishing treasure chests
Rare artifact gaps Trade five Omni Geodes for an Artifact Trove at the Desert Trader, then open the trove at Clint's
Dwarf Scrolls Fight monsters and hoe dirt in the Mines, with the fourth scroll also found in deeper mine soil
Dinosaur Egg Search fishing chests, mountain artifact spots and Pepper Rex drops in Skull Cavern
Prismatic Shard Search deep Skull Cavern ore, Mystic Stones and monster drops after reaching the Mines' bottom

Keep the first useful Prismatic Shard for a Galaxy Sword if combat is holding you back. Incubate a first Dinosaur Egg in an upgraded Coop if you want renewable eggs, then donate a later one.

There are more display spaces than donations, so a few empty tiles are normal. The Stardrop reward is the reliable completion check and also advances Mystery Of The Stardrops.

SourcesStardew Valley Wiki: Museum · Stardew Valley Wiki: Artifacts · Stardew Valley Wiki: Minerals · Stardew Valley Wiki: Desert Trader

The Beloved Farmer

silver · grind

Reach a 10-heart friend level with 8 people.

Have eight people at ten hearts on the same farm. I recommend eight non-datable villagers so we can reach ten without buying Bouquets or managing several dating relationships.

Use these as a practical group. Their homes give us a repeatable visiting route, while the gifts can come from farming, cooking and fishing:

Villager Where to start looking Useful gift
Linus Tent north of Robin's Coconut or Cactus Fruit
Robin Carpenter's Shop in the mountains Spaghetti from Gus
Demetrius Robin's house and nearby lake Strawberry
Pam Trailer, then the bus stop after repair Parsnip
Lewis Mayor's Manor, south of Pierre's Hot Pepper
Evelyn House east of Pierre's Tulip
George Evelyn's house Leek
Gus Stardrop Saloon Orange

These are liked or loved gifts, not a claim that every item gives the same points. Speak daily, give two gifts each week and prioritise a loved birthday gift. The Social tab shows both hearts and this week's gift marks. Visit the Saloon in the evening to catch several people together.

Do not replace these relationships with dating candidates at eight hearts. Eight is their normal cap, but this trophy needs ten. Keep the eight finished friendships while working on Popular.

SourcesStardew Valley Wiki: Friendship · Stardew Valley Wiki: Linus · Stardew Valley Wiki: Robin · Stardew Valley Wiki: Demetrius · Stardew Valley Wiki: Pam · Stardew Valley Wiki: Lewis · Stardew Valley Wiki: Evelyn · Stardew Valley Wiki: George · Stardew Valley Wiki: Gus

Popular

bronze · grind

Reach a 5-heart friend level with 20 people.

Reach five hearts with 20 people on the same farm. Make this a weekly routine rather than leaving all the gifts until the end.

Talk whenever you pass someone, keep a stack of liked gifts and use the birthday calendar. Universal likes such as most vegetables and fruit-tree fruit are useful, but have exceptions. Check the person's gift history in Social after gifting instead of assuming every villager likes the same item. A bad reaction means we should change gifts.

Keep the eight ten-heart friends from The Beloved Farmer, then add 12 others. Datable villagers can count at five hearts without a Bouquet. Kent arrives in Year 2, Sandy becomes available after bus repair, and island progress adds Leo, so later progress gives more choices.

For Dwarf friendship, first donate all four Dwarf Scrolls and claim the translation guide at the museum. Krobus becomes reachable after Gunther awards the Rusty Key for 60 donations. Marlon, Gil, Gunther and Morris are not ordinary giftable friendship targets.

Check that 20 people actually show five hearts or more together. Keep talking to unfinished villagers so decay does not quietly undo part of the list.

SourcesStardew Valley Wiki: Friendship · Stardew Valley Wiki: Museum · Stardew Valley Wiki: Dwarf · Stardew Valley Wiki: Krobus

Gourmet Chef

silver · collectible · grind

Cook every recipe.

Learn and cook all 81 dishes on the current PS4 version. Buying or receiving a finished meal does not count. Use a kitchen after the first farmhouse upgrade. Keep ingredients in the fridge or your inventory, select each recipe and cook at least one.

Learn the whole menu

  • Watch The Queen of Sauce on TV on Sundays, starting Spring 7. Its 32 recipes run over two years. Wednesday reruns prioritise previously aired recipes we do not know.
  • After finding 100 Golden Walnuts, the Bookseller can sell the Queen Of Sauce Cookbook for 50,000g. Read it to learn every TV recipe, including ones not yet aired.
  • Raise all five skills to level 10 for the skill recipes. This includes Moss Soup at Foraging 3 and Squid Ink Ravioli at Combat 9.
  • For mailed recipes, raise Caroline, Clint, Demetrius, Emily, Evelyn, George, Gus, Jodi, Kent, Leo, Lewis, Linus, Marnie, Pam, Robin, Sandy and Shane to at least seven hearts. Pierre needs three, and Willy needs nine for his last mailed recipe. Read their letters. Include Kent after Year 1, Sandy after bus repair and Leo on Ginger Island. Emily and Shane are datable, but their recipes still count. Emily sends Salad at three hearts and Red Plate at seven. Shane sends Pepper Poppers at three and Strange Bun at seven. No Bouquet is needed to reach those levels. Enter Evelyn's house while she is home after reaching four hearts and accept her cookie recipe.
  • Buy the recipe entries at Gus's Saloon, including Triple Shot Espresso. A purchased meal with the same name is a different item.
  • On Ginger Island, buy Ginger Ale from the Volcano Dwarf, Banana Pudding from the Island Trader for 30 Bone Fragments, and Tropical Curry from Gus for 2,000g when he staffs the resort bar. Raise Leo to seven hearts for both of his mailed recipes.

A Distant Shore is part of the cooking route even though the island arrival trophy belongs to the update group. The Volcano Dwarf is on floor 5 and requires the Dwarvish Translation Guide. The resort costs 20 Golden Walnuts after the island farmhouse is restored. Gus is not there every day, so return when he visits.

Cook and check the gaps

The Cooking page in Collections records dishes actually cooked. At the stove, an unknown recipe shows a silhouette and ???, while a known recipe lists its ingredients. Learn missing recipes first, then gather what their tooltips request.

Keep seasonal crops, foraged mushrooms, tree fruit, eggs, milk and several of each fish rather than selling everything. Put valuable fish somewhere other than the fridge before cooking recipes that accept any fish. Grow island fruit and Taro Root once the island farm is open.

Cook one of every remaining dish. If the list stalls, check Leo's mail, Gus's island recipe, the TV cookbook and Moss Soup before repeating meals you already made.

SourcesStardew Valley Wiki: Cooking · Stardew Valley Wiki: The Queen of Sauce · Stardew Valley Wiki: Bookseller · Stardew Valley Wiki: Leo · Stardew Valley Wiki: Volcano Dungeon · Stardew Valley Wiki: Island Trader · Stardew Valley Wiki: Ginger Island · Stardew Valley Wiki: Evelyn · Stardew Valley Wiki: Fish Shop · Stardew Valley Wiki: Emily · Stardew Valley Wiki: Shane

Craft Master

gold · collectible · grind

Craft every item.

Learn and personally craft all 149 required recipes on the current PS4 version. The Wedding Ring is excluded, including in multiplayer. Do not use an old 1.0 checklist.

Turn on Options → Show Advanced Crafting Information. Open Crafting with Triangle button, highlight a recipe and check its crafted count. Make at least one of each. A machine obtained as a reward still needs to be crafted separately.

Unlock the recipes before checking their counts

After the first two farmhouse upgrades, order Robin's third upgrade for 100,000g and let the cellar finish. It teaches Cask. The 33 Casks supplied with the cellar do not count as crafting, so make one yourself from 20 Wood and one Hardwood. The nursery alone is enough for Living Large, but not for this all-recipe requirement.

Reach level 10 in all five skills and claim all five mastery rewards in the Cindersap Forest cave. Continue gaining XP after level 10 to fill the mastery bar. The mastery rewards add recipes such as the Heavy Furnace, Mystic Tree Seed, Treasure Totem, Challenge Bait, Anvil and Mini-Forge.

Buy every recipe offered by these merchants:

Seller What to check
Robin All paths, floors, braziers, lamp-posts, Big Chest and the remaining recipe stock. Reopen the shop after buying a brazier because later ones appear in sequence
Pierre Grass Starter and Dehydrator
Willy Fish Smoker
Dwarf in the Mines Weathered Floor and Big Stone Chest
Krobus in the Sewers Crystal Floor and Wicked Statue
Desert Trader Warp Totem: Desert recipe for ten Iridium Bars
Volcano Dwarf, floor 5 Warp Totem: Island recipe for 10,000g
Island Trader Deluxe Retaining Soil recipe for 50 Cinder Shards
Qi's Walnut Room Deluxe Fertilizer, Hyper Speed-Gro, Magic Bait, Heavy Tapper, Hopper and Blue Grass Starter recipes

The Dwarves require all four museum scroll donations and the claimed translation guide. The Mines Dwarf is behind the rock at the right of the entrance floor. Break that rock with a Steel Pickaxe or a bomb. Krobus requires the Rusty Key from 60 donations. Follow A Distant Shore for the island and Perfection for Walnut Room access and Qi Gems. Buy the recipe, not just a finished item.

Check friendship, events and quests

  • Enter Caroline's sunroom behind her kitchen on a non-rainy day between 9am and 5pm at two hearts. Its event gives Tea Sapling by mail afterwards.
  • Enter the mountain area near Linus's tent on a dry evening between 8pm and midnight at four hearts for Wild Bait.
  • Enter Robin's home while she is there at six hearts for Flute Block and Drum Block.
  • At five hearts with Gus, leave the farmhouse between 6am and 11:30am on a non-rainy day. His visit gives Mini-Jukebox and its recipe.
  • Reach three hearts with Krobus and read his mail for Dark Sign.
  • Donate an Ancient Seed artifact and collect both Gunther's seed and recipe. After Greenhouse restoration, receive Evelyn's Garden Pot visit.

From Fall 2, Year 1, check the Special Orders board below Lewis's house every Monday. Finish these orders and read the reward mail:

Order Recipe
A Curious Substance, Wizard Mini-Obelisk
Prismatic Jelly, Wizard Monster Musk
Cave Patrol, Clint Geode Crusher
Aquatic Overpopulation or Biome Balance, Demetrius Farm Computer
Fragments of the Past, Gunther Bone Mill
Community Cleanup, Linus Fiber Seeds
Robin's Resource Rush Stone Chest
Juicy Bugs Wanted!, Willy Quality Bobber
Island Ingredients, Caroline Solar Panel

Accept an order before gathering items it says must be fresh. Use its Journal objectives for the quantity and delivery box. Failed orders return in the pool, so wait for another posting.

Buy Tub o' Flowers recipe at the Flower Dance on Spring 24 and Jack-O-Lantern recipe at Spirit's Eve on Fall 27. Missing a festival means waiting until the next year, not restarting the farm.

Collect all eight Rarecrows for the Deluxe Scarecrow recipe. Their sources are the Fair token shop, Spirit's Eve, Casino, Traveling Cart in fall or winter, Flower Dance, Dwarf, 20 museum artifacts and 40 total museum donations. Keep them until the recipe arrives in the mail. The winter Festival of Ice also sells the Traveling Cart's Rarecrow.

For the Casino Rarecrow, first complete The Mysterious Qi. Put a Battery Pack in the wall box inside the tunnel west of the Bus Stop, then follow the notes by putting a Rainbow Shell in the Railroad station box, ten Beets in Lewis's fridge and a Solar Essence in the desert sand dragon's mouth. Inspect the woodpile beside the farmhouse for the Club Card. Enter through the back of Sandy's shop and buy the Rarecrow for 10,000 Qi Coins. The exchange machine can supply those coins for 100,000g if you do not want to gamble. Save a Rainbow Shell from the beach in summer for the train-platform step. It is a different item from the winter Nautilus Shell.

On Ginger Island, complete Birdie's item exchange for Fairy Dust and Professor Snail's fossil collection and surveys for Ostrich Incubator. Their local steps are below.

Island quest recipes

Speak to Birdie at the far west of the island farm. Pass her War Memento to Kent, then carry each resulting item through Gus → Sandy → George → Wizard → Willy → Birdie. The last delivery gives Fairy Dust's recipe.

Pay ten Walnuts to repair the Dig Site bridge north of the island farm. Bomb the blocked cave there to free Professor Snail, then visit his tent. Donate the fossil pieces and answer the surveys, 22 purple flowers and 18 purple starfish.

Fossil Method
Two legs and ribs Break Dig Site bone nodes
Skull Open Golden Coconuts at Clint's
Spine Fish in the Dig Site river
Tail Pan the Dig Site river's sparkling spots
Snake skull Dig western island artifact spots or fish in the west
Two snake vertebrae Dig western island artifact spots. Keep soil there accessible
Mummified Frog Cut jungle weeds east of the dock
Mummified Bat Break rocks in the Volcano Dungeon

Shake island palm trees with visible coconuts and dig island artifact spots for Golden Coconuts, then have Clint process them. After opening the first one, the Island Trader also exchanges ten ordinary Coconuts for another. Keep opening them until the fossilized skull appears.

Bring a Pan for the fossilized tail. After the Community Center's Fish Tank removes the Glittering Boulder, enter the mountain area for Willy's panning scene and Copper Pan. A replacement is sold at his Fish Shop. Equip it and use Square button beside a sparkling water patch in the Dig Site river.

Claim the final office reward to learn Ostrich Incubator. Buying Walnuts does not complete these fossil donations for us.

Finish the actual crafting

Known recipes alone are not enough. Work through every Crafting page and make each zero-count recipe. Save uncommon materials such as Marble, a Dwarf Gadget, Dragon Teeth and Radioactive Ore. The dangerous Mines unlock the radioactive materials through Danger in the Deep.

If every visible recipe has a count, revisit the acquisition list. Unknown crafting recipes do not all appear as obvious empty slots. The Deluxe Scarecrow, festival decorations, island quest rewards and mastery recipes are common final gaps.

SourcesStardew Valley Wiki: Crafting · Stardew Valley Wiki: Mastery Cave · Stardew Valley Wiki: Carpenter's Shop · Stardew Valley Wiki: Dwarf · Stardew Valley Wiki: Krobus · Stardew Valley Wiki: Volcano Dungeon · Stardew Valley Wiki: Island Trader · Stardew Valley Wiki: Qi's Walnut Room · Stardew Valley Wiki: Caroline · Stardew Valley Wiki: Linus · Stardew Valley Wiki: Robin · Stardew Valley Wiki: Gus · Stardew Valley Wiki: Quests · Stardew Valley Wiki: Scarecrow · Stardew Valley Wiki: Island Field Office · Stardew Valley Wiki: Cask · Stardew Valley Wiki: Pans · Stardew Valley Wiki: Golden Coconut · Stardew Valley Wiki: Rainbow Shell

Master Angler

silver · collectible · grind

Catch every fish.

Catch all 72 entries in the current Fishing collection on one farmer. This includes the five original legendary fish, Crab Pot catches, algae, Seaweed and the three jellies. Qi's Extended Family fish are excluded.

Bought fish, forage picked up on the beach and Fish Pond harvests do not replace catching an entry yourself. Use Collections → Fish as the checklist. A newly caught entry becomes coloured.

Prepare the rod

Get Willy's rod after his opening letter. Cast with Square button, then tap or hold and release that button to keep the green fishing bar over the fish until the catch meter fills. Short taps are easier to control than long holds.

Raise Fishing to 10 and buy the Iridium Rod from Willy once it is available at Fishing 6. Add bait and a Trap Bobber for hard catches. Fishing food raises the bar's size. A Seafoam Pudding can help with the legendaries. Avoid the Training Rod for the complete list, as many required catches cannot appear with it.

Work through the waters

The table gives one practical route per entry, not every possible alternative. Unstated weather means any weather. Time windows use the game's clock, and a season can be revisited in later years.

Catch Where and when
Anchovy Ocean, spring or fall, any time
Sardine Ocean, spring, fall or winter, 6am–7pm
Herring Ocean, spring or winter, any time
Eel Ocean, spring or fall rain, 4pm–2am
Flounder Ocean, spring or summer, 6am–8pm
Halibut Ocean, spring, summer or winter, 6am–11am or 7pm–2am
Pufferfish Ocean, sunny summer, noon–4pm
Tuna Ocean, summer or winter, 6am–7pm
Red Mullet Ocean, summer or winter, 6am–7pm
Red Snapper Ocean, summer or fall rain, 6am–7pm
Octopus Ocean, summer, 6am–1pm
Tilapia Ocean, summer or fall, 6am–2pm
Super Cucumber Ocean, summer or fall, 6pm–2am
Sea Cucumber Ocean, fall or winter, 6am–7pm
Albacore Ocean, fall or winter, 6am–11am or 6pm–2am
Squid Ocean, winter, 6pm–2am
Sunfish Town or forest river, sunny spring or summer, 6am–7pm
Smallmouth Bass Town river or forest pond, spring or fall, any time
Catfish Town or forest river, spring or fall rain, 6am–midnight
Shad Town or forest river, spring, summer or fall rain, 9am–2am
Rainbow Trout River or mountain lake, sunny summer, 6am–7pm
Dorado Forest river, summer, 6am–7pm
Pike Town or forest river or forest pond, summer or winter, any time
Salmon Town or forest river, fall, 6am–7pm
Tiger Trout Town or forest river, fall or winter, 6am–7pm
Walleye River, forest pond or mountain lake, fall rain, noon–2am
Perch River, forest pond or mountain lake, winter, any time
Lingcod Town or forest river or mountain lake, winter, any time
Bream Town or forest river, all seasons, 6pm–2am
Largemouth Bass Mountain lake, all seasons, 6am–7pm
Bullhead Mountain lake, all seasons, any time
Carp Mountain lake, spring, summer or fall, any time
Chub Mountain lake or forest river, all seasons, any time
Sturgeon Mountain lake, summer or winter, 6am–7pm
Midnight Carp Mountain lake or forest pond, fall or winter, 10pm–2am
Goby Lower waterfall pool east of the Hat Mouse's house in southern Cindersap Forest, any season or time
Woodskip Secret Woods pond, any season or time. Steel Axe removes its entrance log
Ghostfish Mines floor 20 or 60 pond, any time
Stonefish Mines floor 20 pond, any time
Ice Pip Mines floor 60 pond, any time
Lava Eel Mines floor 100 lava pool, any time
Sandfish Calico Desert pond by Sandy's shop, 6am–8pm
Scorpion Carp Same desert pond, 6am–8pm, Fishing level 4
Slimejack Mutant Bug Lair in the Sewers, any time
Void Salmon Witch's Swamp reached from the Railroad cave, any time
Lionfish Ginger Island ocean, any season or time
Blue Discus Ginger Island freshwater, any season or time
Stingray Pirate Cove pool, any season or time
Midnight Squid, Spook Fish, Blobfish Night Market submarine, Winter 15–17. Enter 5pm–11pm and pay 1,000g
Crimsonfish Summer, Fishing 5. Repair the beach bridge with 300 Wood and cast well out from the eastern pier
Angler Fall, Fishing 3. Stand on the small wooden bridge north of JojaMart and fish into the river
Legend Rainy spring, Fishing 10. Cast into mountain-lake water at least four tiles from every shore, near the submerged log
Glacierfish Winter, Fishing 6. Stand on the southernmost tip of Arrowhead Island in Cindersap Forest and cast south at least three tiles from land
Mutant Carp Sewers, any season or time. Donate 60 museum items and receive the Rusty Key
Lobster, Crab, Cockle, Mussel, Shrimp, Oyster, Clam Collect from baited ocean Crab Pots
Crayfish, Snail, Periwinkle Collect from baited freshwater Crab Pots
Seaweed, Sea Jelly Catch with a rod in the ocean
Green Algae, River Jelly Catch with a rod in freshwater
White Algae, Cave Jelly Catch with a rod in the Mines. Floor 100 also works for Cave Jelly

Open the late fishing areas

After completing the Community Center or Joja projects, enter the Railroad area for the Wizard's Dark Talisman introduction. Speak to Krobus in the Sewers so he opens the Mutant Bug Lair at the northwest side. Fish there for Slimejack and take the talisman from its chest.

Return to the Railroad cave, remove its blockage and use the portal to the Witch's Swamp for Void Salmon. We do not need to enter the Witch's Hut just to fish in the swamp.

For Stingray, follow A Distant Shore. On Ginger Island, restore the island farmhouse, then pay 20 Golden Walnuts for the beach resort. The opened southeast beach leads east into Pirate Cove. Stingray can be caught inside without waiting for a pirate party.

Crab Pots need bait and a daily collection. Keep pots in both saltwater and freshwater until all ten entries register. Physically collect the catches yourself.

Recover missing entries

Check the collection after each trip, especially the three jellies and the less obvious Crab Pot shellfish. Catch algae with a rod rather than relying on monster drops.

The four seasonal legendary fish also have minimum Fishing levels. Food buffs can meet those thresholds, but they do not remove location requirements. Use a long cast for Crimsonfish, Legend and Glacierfish. The Angler has no deep-water requirement.

If a weather or seasonal window has passed, wait for its next occurrence. Later, Magic Bait from Qi's Walnut Room bypasses time, weather and season restrictions while preserving the relevant water and other access requirements. Willy mails a Stardrop after the complete catch collection.

SourcesStardew Valley Wiki: Fish · Stardew Valley Wiki: Fishing · Stardew Valley Wiki: Spring · Stardew Valley Wiki: Summer · Stardew Valley Wiki: Fall · Stardew Valley Wiki: Winter · Stardew Valley Wiki: Legend · Stardew Valley Wiki: Glacierfish · Stardew Valley Wiki: Crimsonfish · Stardew Valley Wiki: Angler · Stardew Valley Wiki: Goby · Stardew Valley Wiki: Night Market · Stardew Valley Wiki: The Mines · Stardew Valley Wiki: The Desert · Stardew Valley Wiki: Witch's Swamp · Stardew Valley Wiki: Ginger Island · Stardew Valley Wiki: Crab Pot · Stardew Valley Wiki: Qi's Walnut Room

A Big Help

silver

Complete 40 'Help Wanted' requests.

Complete 40 requests on the same farmer. Use Pierre's Help Wanted board for short deliveries and the Special Orders board below Lewis's house for the crafting-recipe work.

Read the accepted Journal entry. Some jobs require fresh catches or newly gathered materials, while deliveries may require placing items in a box rather than handing them to a person. Claim the reward when the job is complete.

There is no limit on the number of days we can take overall. If a request expires, accept a replacement. Check each Monday for a useful Special Order while finishing Craft Master.

SourcesStardew Valley Wiki: Quests

Full Shipment

gold · collectible · grind

Ship every item.

Ship at least one of every entry in Collections → Items Shipped using the farm Shipping Bin or a Mini-Shipping Bin. Direct shop sales do not count. The current 1.6 collection includes island and mastery-related products, so the old mainland list is insufficient.

Open the collection and inspect missing silhouettes. Once an item has been shipped, its name and quantity provide the running checklist. This trophy does not mean selling every fish, cooked dish, mineral or tool in the game.

Build the sources of the uncommon entries:

Missing type What to set up
Eggs, milk and later animal products Upgrade Coops and Barns. Keep both chicken egg colours, ducks, rabbits, goats and pigs, then process their products as needed
Dinosaur Mayonnaise Incubate a Dinosaur Egg in a Big or Deluxe Coop, then process a produced egg in a Mayonnaise Machine
Caviar and Aged Roe Put a Sturgeon in a Fish Pond and age its Roe in a Preserves Jar. Use another fish's Roe for ordinary Aged Roe
Void products Buy a Void Egg from Krobus and incubate it, then process an egg
Ostrich Egg Finish Professor Snail's collection for the incubator, then hatch the egg found by following Journal Scrap 10
Island produce Grow Pineapple, Taro Root, Banana and Mango, gather Ginger and Magma Caps
Radioactive Ore and Bar Enter the dangerous Mines, mine the green nodes and smelt five ore with Coal
Mystic Syrup Claim Foraging Mastery, plant a Mystic Tree Seed, let it mature and attach a Tapper
Raisins and other dried products Put five Grapes, five other fruit or five edible mushrooms into a Dehydrator
Smoked Fish Process a fish with Coal in a Fish Smoker
New seasonal crops Find and grow Carrot, Summer Squash, Broccoli and Powdermelon seeds in their seasons

Not every animal product needs every quality level. Match the actual collection entries rather than producing all possible variations of Wine or Jelly.

Ship a spare of each first-time material and product before selling its whole stock. Save seasonal forage and rare crops, then check the remaining silhouettes after the overnight shipping summary. Follow Craft Master for the quest and mastery prerequisites.

For the first Ostrich Egg, collect and read island Journal Scraps through Scrap 10. Dig in the sand by the curved palm southwest of the Volcano entrance, just inside the palm's loop. Put the egg into an Ostrich Incubator placed inside a Barn, not the Coop's incubator. Ship a later egg once the bird is producing. Keep the first egg out of the kitchen fridge so it cannot be consumed by an ordinary egg recipe.

SourcesStardew Valley Wiki: Collections · Stardew Valley Wiki: Animals · Stardew Valley Wiki: Fish Pond · Stardew Valley Wiki: Ostrich Egg · Stardew Valley Wiki: Mastery Cave · Stardew Valley Wiki: Dehydrator · Stardew Valley Wiki: Fish Smoker

Mystery Of The Stardrops

gold · collectible

Find every stardrop.

Consume all seven Stardrops on one farmer. They are permanent energy upgrades, not the Starfruit crop. The normal maximum energy rises from 270 to 508 when all seven are collected.

Stardrop How to obtain it
Mines Open the floor 100 chest on the normal Mines route
Fair Buy it for 2,000 Star Tokens at the Fall 16 fair
Relationship Reach 12.5 hearts with a spouse or Krobus as roommate
Krobus's shop Pay 20,000g in the Sewers after receiving the Rusty Key for 60 museum donations
Old Master Cannoli Give the statue in the Secret Woods a Sweet Gem Berry
Fishing Read Willy's mail after Master Angler
Museum Claim Gunther's reward after A Complete Collection

For Cannoli, buy a Rare Seed from the Traveling Cart in spring or summer. Plant it early in fall, water it through its 24-day growth, and bring the Sweet Gem Berry to the statue at the northwest of the Secret Woods. A Steel Axe clears the entrance log. Speak to the statue again after the offering to receive its reward.

For the Fair purchase, earn tokens from the grange contest and repeatable fishing minigame. Blue Ribbon supplies a winning display plan.

Keep speaking to and gifting the spouse after marriage until the relationship Stardrop is given. Only one relationship Stardrop counts, so divorce and remarriage do not create extra ones. If a gap remains, check energy on the Skills tab and retrace the seven sources rather than hunting random drops.

SourcesStardew Valley Wiki: Stardrop · Stardew Valley Wiki: Rare Seed · Stardew Valley Wiki: Secret Woods · Stardew Valley Wiki: Stardew Valley Fair

Full House

bronze · grind

Get married and have two kids

Marry a villager and have two children on the same farm. Same-gender marriages can adopt children and satisfy the trophy. Krobus as roommate does not provide the marriage-and-two-children route.

Marry and prepare the nursery

Raise a datable villager to eight hearts, give a Bouquet bought from Pierre for 200g, then reach ten hearts. Complete Robin's first farmhouse upgrade. Repair the bridge at the beach with 300 Wood so the eastern tidal pools are accessible.

On a rainy day, buy a Mermaid's Pendant for 5,000g from the Old Mariner at the eastern beach. Give it to the intended partner and attend the wedding. Winter normally needs a Rain Totem for the Mariner to appear.

Order the second farmhouse upgrade for the nursery, as explained in Living Large. Keep the crib and enough beds for both children.

Wait for both children

Maintain at least ten hearts with the spouse. After at least seven married days, there is a chance of the child question when going to sleep. Answer yes. The birth or adoption follows 14 days later.

The first child must reach the toddler stage, 56 days after arrival, before another child can be requested. Keep the relationship healthy, sleep normally, accept the second request and wait another 14 days for the second child.

The questions are random, so there is no fixed completion night. If they never appear, check the nursery, crib, spouse's hearts and the first child's age. Do not remove the crib or divorce while waiting.

SourcesStardew Valley Wiki: Marriage · Stardew Valley Wiki: Children · Stardew Valley Wiki: Farmhouse

Master Of The Five Ways

silver · grind

Reach level 10 in every skill.

Reach natural level 10 in all five original skills on one farmer. Check the Skills tab. Food bonuses and mastery levels are separate.

Skill Repeatable work
Farming Harvest crops and care for farm animals
Mining Break rocks and ore nodes yourself
Foraging Pick up forage and cut trees and stumps
Fishing Catch fish and collect baited Crab Pots
Combat Kill monsters in the Mines, Skull Cavern and Volcano

The collection route supplies most of this naturally. Combat and Foraging often need extra work. Use the Secret Woods stumps for daily Hardwood and Foraging XP, and work towards Protector Of The Valley while raising Combat.

Once all five show level 10, enter the Mastery Cave behind the door in southern Cindersap Forest. Further XP fills mastery progress. Claim those rewards for the later crafting requirements, but mastery itself is not an extra skill needed for this trophy.

SourcesStardew Valley Wiki: Skills · Stardew Valley Wiki: Mastery Cave · Stardew Valley Wiki: Secret Woods

Protector Of The Valley

silver · grind

Complete all of the Adventure Guild Monster Slayer goals.

Finish all 12 Monster Eradication Goals on the wall to the right of Marlon's counter in the Adventurer's Guild, east of the Mines. Complete Marlon's early slay-Slimes introduction to enter. Check the wall and speak to Gil for earned rewards.

Target Needed Practical hunting area
Slimes 1,000 Mines and Skull Cavern. Slime Hutch and Big Slimes do not count
Void Spirits 150 Mines floors 81–119
Bats 200 Mines, including the frozen floors
Skeletons 50 Mines floors 71–79
Cave Insects 80 Early Mines and Mutant Bug Lair
Duggies 30 Dirt patches on Mines floors 6–29
Dust Sprites 500 Mines floors 41–79
Rock Crabs 60 Crab enemies disguised as rocks in Mines and Skull Cavern
Mummies 100 Skull Cavern
Pepper Rex 50 Skull Cavern prehistoric floors
Serpents 250 Skull Cavern
Magma Sprites 150 Volcano Dungeon, including Magma Sparkers

Use the elevator to revisit productive mine bands, leave through the entrance and re-enter for fresh floors. Monster Musk from the Wizard's Prismatic Jelly order increases monster spawns and helps the larger counts.

Mummies must be knocked down with a weapon and then destroyed by an explosion before they revive. A Crusader-enchanted weapon can kill them directly. For Pepper Rex, stay out of its fire breath, strike from the side and search for more prehistoric floors. Do not staircase past every dinosaur floor while farming the other Skull Cavern materials.

Take healing food and a strong weapon, and check the wall again before grinding an enemy already finished. The last required kill completes the trophy.

SourcesStardew Valley Wiki: Adventurer's Guild · Stardew Valley Wiki: Mummy · Stardew Valley Wiki: Pepper Rex · Stardew Valley Wiki: Forge · Stardew Valley Wiki: Monster Musk

Clear the arcade and preserve its deathless checkpoints

Play Journey of the Prairie King at the Saloon. A normal clear earns Prairie King and sends a home cabinet the following morning.

Practise movement, coin collection and buying bullet upgrades. Then begin a new run for Fector's Challenge. Read its save sequence before attempting the harder screens.

Clear a screen without dying, enter the next screen, leave the arcade and sleep to preserve the good checkpoint. After a death, quit to the title screen and reload the farm without sleeping. Choose Continue to replay from the morning's preserved checkpoint.

Do arcade attempts before valuable daily farm work, since a reload discards the rest of that unsaved day. There is no need to clear Hard Mode.

Prairie King

bronze

Beat 'Journey Of The Prairie King'.

Beat the normal Journey of the Prairie King game on the arcade cabinet in the Stardrop Saloon. Enter after the Saloon opens at noon and interact with the cabinet. This trophy allows deaths. Hard Mode is unnecessary.

Move with the left stick and fire with the right stick. Clear the timed enemy waves, defeat the two cowboy encounters, then defeat Fector in the graveyard world. Keep shooting while moving, leave space to retreat and collect coins when the route to them is safe.

Spend coins on bullet damage and fire rate at the travelling merchant. The first bullet upgrade costs 15 and the first fire-rate upgrade costs 10. Damage upgrades make a large difference against later enemies. Use power-ups to escape a surround rather than losing every life while saving an item.

Current versions save arcade progress when entering the next screen. Exit after a successful level, sleep in the farmhouse to save the day, then return and choose Continue. The detailed checkpoint method and boss advice are in Fector's Challenge.

Winning sends a home arcade cabinet in the next day's mail. Place it indoors to practise without waiting for the Saloon.

SourcesStardew Valley Wiki: Journey of the Prairie King · SDew HQ: Journey of the Prairie King guide
Spoiler: reveal trophy

Fector's Challenge

silver · difficulty

Beat 'Journey Of The Prairie King' without dying.

Complete one normal Journey of the Prairie King run with zero deaths recorded in that run. Practise first using Prairie King. A won practice run also gives a home cabinet, which makes retries more convenient.

Save one successful screen at a time

The arcade checkpoint and the farm's overnight save are different. Use single-player for this method so we can reload the farm cleanly.

  1. Start a new arcade run. Clear the first screen without dying.
  2. Walk into the next screen, then leave the arcade using its exit control. Reaching an open exit without entering the next area is not enough.
  3. Go home and sleep. The overnight farm save now preserves that arcade checkpoint.
  4. Next day, use the cabinet and choose Continue.
  5. If you die, leave the arcade and quit Stardew Valley to its title screen without sleeping. Load the farm again and choose Continue at the cabinet.
  6. Keep only successful deathless stages by exiting and sleeping after them. Repeat through the final boss.

Reloading discards everything done since that morning, so do the arcade attempt before valuable farm work. Do not sleep after a death and overwrite the good checkpoint. If the death was already saved, start a new arcade run for this trophy.

Build a run that can finish

Collect coins without walking into a surround. Buy the first bullet-damage upgrade for 15 coins and first fire-rate upgrade for 10 during the prairie world. Aim for the second bullet upgrade, costing 30, during the forest world. A saved screen with very poor coin drops can be retried by reloading the farm before sleeping.

Keep moving and firing through open lanes. The third world's flying enemies cross obstacles, so kill nearby flyers before concentrating on the slower ground crowd. Farm luck and luck food do not improve this arcade's drops.

At each cowboy boss, use the cover near the top. Step out to provoke a volley, retreat, then shoot diagonally when the boss pauses outside cover. Stay out of the bullets rather than chasing every damage window.

For Fector, keep a rapid-fire or Sheriff Badge power-up if possible. Begin firing down towards him, move slightly off his opening vertical shot line and continue dealing damage while avoiding the later radial volleys. When he summons enemies, clear anything cutting off the retreat. The Tombstone does not protect against boss bullets.

Entering the boss screen gives a checkpoint too. Preserve it with the same overnight method so failed boss attempts do not require replaying the preceding waves. Defeat Fector from a deathless checkpoint. No Hard Mode clear is required.

SourcesStardew Valley Wiki: Journey of the Prairie King · SDew HQ: Journey of the Prairie King guide · Fectors Challenge Trophy!, PlayStation community report

Finish the separate Joja farm and the platinum

Create a second farm and leave the main farm available in Load. Build an income, then follow Joja Co. Member Of The Year to purchase membership and all five developments.

Sleep after each project and attend the final Joja ceremony. This shorter branch farm does not need the main save's collections, relationships or island progress.

Check the base-game trophy group for any missing requirement. Once all other 40 base trophies are earned, Iridium Seal unlocks. The nine trophies under 1.6 Update can remain unfinished without blocking it.

Iridium Seal

platinum

This priceless treasure is the mark of a truly great farmer! Grandpa lives inside...

Earn the other 40 base-game trophies. The nine trophies in the 1.6 Update group are separate from the platinum.

I recommend keeping one main farm for the Community Center, collections, family and money goals. Use a second farm for the opposing Joja development trophy. The current PS4 version includes later cooking and crafting recipes, so even the base platinum takes us to Ginger Island and through the mastery unlocks.

The arcade game's deathless clear is the main skill check. Read Fector's Challenge before starting a serious attempt, as its daily save method makes failed stages recoverable.

SourcesPlayStationTrophies: Stardew Valley trophy list · Stardew Valley Wiki: Console Version History · Stardew Valley Wiki: Perfection · Stardew Valley Wiki: Journey of the Prairie King

Joja Co. Member Of The Year

bronze · missable

Become a Joja Co. member and purchase all the community development perks.

Use a separate farm from Local Legend. Do not replace a main Community Center farm just to earn this trophy.

Begin the new farm with ordinary settings and earn money through crops, fishing and later processed goods. Keep reinvesting in seeds and useful equipment until the farm can fund 140,000g in total. This total is 5,000g for membership and 135,000g in projects, paid over time.

After the Community Center has been introduced, speak to Morris at the JojaMart counter in eastern town and buy membership for 5,000g. The Center becomes the warehouse. Return the next day to access the Community Development Form.

Project Cost
Minecarts 15,000g
Panning boulder 20,000g
Quarry bridge 25,000g
Greenhouse 35,000g
Desert bus 40,000g

Only one project can be purchased per day. Sleep after each purchase so the work completes. I would buy the Greenhouse early if this farm needs a reliable year-round crop income. Projects already restored by completed Community Center rooms remain restored, but partial bundle work gives no discount.

After all five developments are finished, enter town on a sunny nonfestival day for Joja's completion ceremony. Check the trophy, then return to the main farm. The later 500,000g Movie Theater purchase is not one of the required five projects.

SourcesStardew Valley Wiki: Joja Community Development Form · Stardew Valley Wiki: Community Center

Finish the update trophies and reach the Summit

Return to the main farm for the 1.6 Update group. Finish the theater, Fair and Luau checks, read all 19 power books and complete the raccoon family's nine requests.

Use Qi's Walnut Room for Danger in the Deep and the gems needed for Infinite Power. Open the dangerous normal Mines, not just Skull Cavern's invasion.

For Perfection, inspect the tracker and close each remaining category. The standard route adds all maximum friendships, all Walnuts, four obelisks and the Gold Clock to the collection work already done. Its solution also explains the optional paid services and what they do not award.

Sleep after reaching 100%, then travel north of the Railroad to the Summit. This visit finishes the final update trophy. The farm stays playable afterwards.

Well-Read

silver · 1.6 Update · optional

Read every book.

Read all 19 power books. XP-only books and the Queen Of Sauce Cookbook do not count. Reading a book gives its power on the Special Items & Powers tab, and read copies show a thumbs-up mark.

The Bookseller visits twice per season on dates marked with a balloon on the calendar. Follow the path uphill behind JojaMart or the Movie Theater. Check the morning announcement and bring money.

Required books Reliable route
Price Catalogue Bookseller, 3,000g
Way Of The Wind pt. 1 Bookseller, 15,000g
Way Of The Wind pt. 2 Bookseller, 35,000g after reading part 1
Horse: The Book Bookseller, 25,000g
Ol' Slitherlegs Bookseller, 25,000g
Animal Catalogue Marnie, 5,000g from Year 2
The Diamond Hunter Volcano Dwarf, ten Diamonds
Book of Mysteries Have Clint open Mystery Boxes until it appears
The remaining 11 listed below Original activities, or the Bookseller's rotating 20,000g stock from Year 3

The other 11 are The Alleyway Buffet, The Art O' Crabbing, Dwarvish Safety Manual, Jewels Of The Sea, Raccoon Journal, Woody's Secret, Jack Be Nimble, Jack Be Thick, Friendship 101, Monster Compendium, Mapping Cave Systems and Treasure Appraisal Guide.

The Year 3 stock is a fallback, not all 11 books at every visit. Keep checking until every power is present. Many arrive naturally through monster kills, fishing treasure, chopping trees, artifact spots and the raccoon requests.

Mystery Boxes become available after Mr. Qi's plane appears in an overnight event, which can occur from Summer 22, Year 1, or after collecting the second Prize Ticket. Carry them to Clint and choose his geode-processing service to open them. Keep doing normal farm and exploration work for more boxes if the book does not drop.

The Diamond Hunter requires reaching floor 5 of the Volcano and understanding Dwarvish. Use Craft Master for the translation prerequisite. Buying a book is not the final step, so select and read every new one.

SourcesStardew Valley Wiki: Books · Stardew Valley Wiki: Bookseller · Stardew Valley Wiki: Volcano Dungeon · Stardew Valley Wiki: Random Events

Two Thumbs Up

bronze · 1.6 Update · optional

See a movie.

Watch a film in the Movie Theater. I recommend building it on the main Community Center farm.

After the Center is finished, a rainy-night event opens the abandoned JojaMart. Enter and complete the Missing Bundle, which accepts five of these six offerings:

Offering Preparation
Silver-or-better Wine Age ordinary Wine in a cellar Cask
Dinosaur Mayonnaise Put a Dinosaur Egg in a Mayonnaise Machine
Prismatic Shard Keep a spare from mining or combat
Five gold Ancient Fruit Grow with quality fertilizer and save suitable harvests
Gold-or-better Void Salmon Fish in the Witch's Swamp
Caviar Put Sturgeon Roe into a Preserves Jar

The theater is built overnight after the bundle. Buy a Movie Ticket for 1,000g at the booth, enter and walk to the screening area to watch the film. A guest is optional.

The easiest fixed five depend on your farm. Caviar, Wine and Dinosaur Mayonnaise can be produced repeatedly once their setup exists, so we do not have to sacrifice the only Prismatic Shard. Full Shipment covers their farm production and Master Angler opens the swamp.

On a Joja farm, Morris instead sells the theater for 500,000g after all five development projects. This is an alternative route, not an extra purchase needed on the Community Center farm.

SourcesStardew Valley Wiki: Movie Theater · Stardew Valley Wiki: Bundles · Stardew Valley Wiki: Fish Pond · Stardew Valley Wiki: Farmhouse

Good Neighbors

bronze · 1.6 Update · optional · grind

Help your forest neighbors grow their family.

Finish nine item requests for the raccoon family at the Giant Stump west of Marnie's Ranch, then revisit Cindersap Forest on a sunny day for the family scene.

First restore the Greenhouse. An overnight strong-wind event can then fell the tree in northern Cindersap Forest. Inspect the resulting stump and bring 100 Hardwood to repair it. A raccoon moves in the next day.

Interact with him to see the two requested offerings. Deliver the exact items and quantities, then wait seven days for the next request. Keep visiting and completing requests until the family has eight children. The first request brings the wife, so simply counting visible family members is not the same as finishing nine requests.

The requests use current seasonal goods and processing machines. Prepare a Fish Smoker, Preserves Jar and Dehydrator. A smoked fish needs the named fish and Coal. Dried fruit or mushrooms normally use five matching ingredients per batch. Follow the icons for the requested type instead of handing over the raw version.

The tree event is random and requests are spaced apart, so start this while other collections are in progress. Missing a season does not destroy the questline. Check the displayed request again and grow or obtain its items when possible.

SourcesStardew Valley Wiki: Giant Stump · Stardew Valley Wiki: Random Events · Stardew Valley Wiki: Fish Smoker · Stardew Valley Wiki: Dehydrator

Danger in the Deep

silver · 1.6 Update · optional · difficulty

Reach the bottom of the 'dangerous' mines.

Reach floor 120 of the dangerous version of the normal Mines. Skull Cavern's invasion is a different challenge.

Follow A Distant Shore, open the western island farm and collect enough Golden Walnuts to enter Qi's Walnut Room at the far northwest. The door requires 100 found Walnuts, not 100 held in the wallet. If it remains shut at that counter, collect one more, as the first introductory Walnut can be excluded from the gate's count.

Check Qi's board on Mondays until Danger In The Deep appears. Accept it. The normal Mines' elevator resets for the challenge, and we must descend to 120 within the remaining week. Accepting late in the week leaves fewer days.

Prepare a Galaxy weapon, healing food, bombs and a stock of Staircases. Staircases can be crafted from 99 Stone at Mining 2, or traded for Jade at the Desert Trader on Sundays. Around 120 gives a direct descent without relying on ladder drops. Reached five-floor elevator stops can still divide the work across days during the quest.

Go to the mountain Mines, not the desert. Descend until floor 120 and check the trophy and completed order. Do not waste the week fighting every enemy if the deadline is close.

Completing the order unlocks the Shrine of Challenge at floor 120. It lets the Mines stay dangerous after an overnight toggle. If the trophy needs a repeat trigger, activate the shrine, sleep, then return to floor 120 while the dangerous mode is active. Green nodes in this version provide Radioactive Ore for the remaining recipes.

SourcesStardew Valley Wiki: Qi's Walnut Room · Stardew Valley Wiki: Golden Walnut · Stardew Valley Wiki: The Mines · Stardew Valley Wiki: Desert Trader

Infinite Power

silver · 1.6 Update · optional

Obtain the most powerful weapon.

Create an Infinity Blade, Infinity Dagger or Infinity Gavel. One is enough. I recommend the Infinity Blade because it begins with the Galaxy Sword.

  1. Repair the desert bus, carry a Prismatic Shard to the three pillars in the northeast of Calico Desert and stand at their centre while holding it. The shard becomes a Galaxy Sword.
  2. Reach the Volcano Forge on Ginger Island using A Distant Shore.
  3. Open Qi's Walnut Room and earn 120 Qi Gems through his weekly orders. Danger in the Deep is one available order, not a mandatory source for every gem.
  4. Buy three Galaxy Souls, costing 40 Qi Gems each.
  5. Bring the sword, all three souls and 60 Cinder Shards to the Forge. Put the Galaxy weapon in the left slot and a Galaxy Soul in the right, then forge. Repeat three times on that same weapon.

Each soul costs 20 Cinder Shards to apply. The first two applications do not yet create the final weapon. After the third, its name and appearance change to Infinity Blade and the trophy unlocks.

Mine Cinder Shard nodes and fight Volcano enemies for the shards. Ordinary gem forging or a random enchantment alone does not count as an Infinity upgrade.

SourcesStardew Valley Wiki: Forge · Stardew Valley Wiki: Galaxy Sword · Stardew Valley Wiki: Qi's Walnut Room · Stardew Valley Wiki: Volcano Dungeon

Perfection

silver · 1.6 Update · optional · collectible · grind

Reach the summit.

Reach 100% on Qi's Perfection Tracker, sleep, then visit the Summit north of the Railroad. The nine update trophies are separate from the platinum, and this is the longest update goal.

Open Ginger Island through A Distant Shore, then reach Qi's Walnut Room at the northwest of Island West after finding 100 Golden Walnuts. The introductory Walnut may not count for its gate, so obtain one more if access remains blocked. Inspect the tracker statue inside.

Complete the tracker

Category What to finish
Produce and forage Every entry in Full Shipment
Four obelisks Earth, Water, Desert and Island Obelisks built on the main farm
Gold Clock Build it on the main farm
Monster goals All 12 goals in Protector Of The Valley
Great friends Maximum friendship with all 34 eligible villagers, including Kent, Sandy, Dwarf, Krobus and Leo
Farmer level All five skills at 10
Stardrops All seven in Mystery Of The Stardrops
Cooking All 81 dishes in Gourmet Chef
Crafting All 149 required items in Craft Master
Fishing All 72 entries in Master Angler
Walnuts All 130 Golden Walnuts

For Great Friends, undated marriage candidates count as complete at eight hearts. Non-datable villagers need ten. Check every eligible Social entry. The children are excluded. Reading the power books and the deathless arcade clear are not themselves Perfection Tracker requirements.

The Golden Joja Parrot west of the Volcano can obtain the remaining Walnuts for 10,000g each, even on the Community Center route. Pay its quoted total and sleep. This is a complete paid alternative for the Walnut category, not a requirement to solve every island puzzle.

Build the Wizard's structures

After Community Center or Joja completion, enter the Railroad to start Dark Talisman. Speak to Krobus in the Sewers, enter the newly opened Mutant Bug Lair at its northwest, and take the talisman from the far chest. Use it to open the Railroad cave and reach the swamp.

Give the blocking goblin a Void Mayonnaise, made from a Void Egg in a Mayonnaise Machine. Krobus sells Void Eggs. Enter the Witch's Hut, take the Magic Ink and return it to the Wizard. His tower's book then offers the magical buildings.

Building Gold and materials
Earth Obelisk 500,000g, ten Iridium Bars, ten Earth Crystals
Water Obelisk 500,000g, five Iridium Bars, ten Clams, ten Coral
Desert Obelisk 1,000,000g, 20 Iridium Bars, ten Coconuts, ten Cactus Fruit
Island Obelisk 1,000,000g, ten Iridium Bars, ten Dragon Teeth, ten Bananas
Gold Clock 10,000,000g

Build all five on the same main farm. The money loop in Legend can keep funding them after that trophy has unlocked.

Finish and visit the Summit

Inspect each incomplete line on the tracker and finish it on the main save. If cooking or crafting looks complete but its percentage is low, unknown recipes can still be missing. Use those linked solutions' acquisition steps.

There is also an optional paid route. After inspecting the tracker, read Fizz's invitation and meet him in the mushroom cave at the Dig Site where Professor Snail was trapped. Each 500,000g Perfection Waiver adds one percentage point. Waivers can close remaining tracker percentage, but they do not award separate cooking, crafting, fishing or other trophies whose actions we skipped.

When the tracker reaches 100%, sleep. The next morning's rumbling message signals that the boulder beyond the Railroad has moved. Travel north through the Railroad to the Summit and view its scene. Merely reaching Grandpa's evaluation or earning the platinum does not replace this final visit.

SourcesStardew Valley Wiki: Perfection · Stardew Valley Wiki: Qi's Walnut Room · Stardew Valley Wiki: Golden Walnut · Stardew Valley Wiki: Witch's Swamp · Stardew Valley Wiki: Earth Obelisk · Stardew Valley Wiki: Water Obelisk · Stardew Valley Wiki: Desert Obelisk · Stardew Valley Wiki: Island Obelisk · Stardew Valley Wiki: Gold Clock

Cleanup

Sources

Report an issue

Your report and the guide details above will be emailed privately to The Wayside. Add your email only if you would like a reply.

Edit draft

Controller icons

Use [ps:cross], [ps:circle], [ps:square] or [ps:triangle] for PlayStation face buttons. Directions use [ps:up], [ps:down], [ps:left] and [ps:right]. Shoulder and stick buttons use [ps:l1] through [ps:l3] and [ps:r1] through [ps:r3]. Use [ps:options] for Options. Preview formatting to see the icons.

Formatting help

Headings, bold, italics, numbered and nested lists, task lists, quotes, tables, links, code and images are supported. Raw HTML is displayed as text.

![Describe the image](https://example.com/image.jpg)
@[youtube](https://www.youtube.com/watch?v=VIDEO_ID)

:::spoiler Optional encounter
Text, images or video to reveal deliberately.
:::

Add a short label after :::spoiler, such as Camp scene or Ending choices. The panel adds “Spoiler:” automatically. Name the topic without revealing the outcome. Paste an HTTPS image URL to add an image. Readers choose when to load YouTube videos.

Only you can read this draft.

Publish guide